Showing posts with label appetizers. Show all posts

Baked Brie with Candied Walnuts and Caramelized Onions


My mom typically serves various versions of baked brie around the holidays, so I essentially grew up eating it. It's a classic appetizer with limitless variations. Different jams work well for a salty/sweet appetizer, or you could make it more savory with roasted garlic.

I served this during a long-overdue girls' night in this past week. All three of the ladies I spent the evening with are "food people," so just as I expected when I put this together, nobody turned their nose up at baked cheese with onions and sweet nuts. It's a surprisingly perfect combination, and not surprisingly at all, I didn't come home with any of it. Maybe I ate most of it, maybe I didn't...

You will need:

1 wheel Brie cheese (double cream is the meltiest in my experience), rind intact or cut off
1 sheet puff pastry
1 small yellow onion, very thinly sliced
1/2 cup walnuts
1/4 cup (1/2 a stick) butter
1 cup brown sugar
1 teaspoon kosher salt

Caramelized onions

To a hot pan, add olive oil and once the oil shimmers, add onions. Season with salt and cook over low heat until the onions are soft and caramelized. Remove onions to a plate, cool.

Candied walnuts

Melt butter in a medium saucepan. Once the butter is melted and just barely browned, whisk in the brown sugar. Add a pinch of kosher salt and remove from heat, stirring every so often to keep the butter and sugar from separating. While the butter cools, lay walnuts in a single layer on a baking sheet, and toast in a 350 degree oven. Bake for 5-7 minutes, or until you can just smell them - be careful they don't burn (it will happen quickly).

Add hot walnuts to butter/sugar mixture, and, working quickly with a wooden spoon, coat all the walnuts evenly. Still working quickly, spread the coated walnuts back onto your baking sheet. Using a fork, separate the nuts from each other, sprinkle with kosher salt, and allow to cool completely. Note: you may want to line your baking sheet with parchment paper or a nonstick mat. I stuck my whole pan in the freezer to cool them quickly.

Baked brie

Using a sharp knife, carefully cut the top rind off of the wheel of Brie (optional - your toppings will melt into the brie more if you remove the rind, but it is totally edible).

Lay your puff pastry on a baking sheet and place the Brie on top of it, cut side up. Spoon caramelized onions over the top of the cheese, then layer on cooled candied walnuts.

Wrap the cheese in the puff pastry by lifting each corner of the pastry toward the center of the Brie and pressing gently. Cut off any excess dough. If you'd like, you can make something decorative (like leaves) with the excess and place them on top of the dough.

Bake at 350 degrees for 25-30 minutes or until the dough is golden brown. Serve hot with sliced apples, crackers or baguette slices.

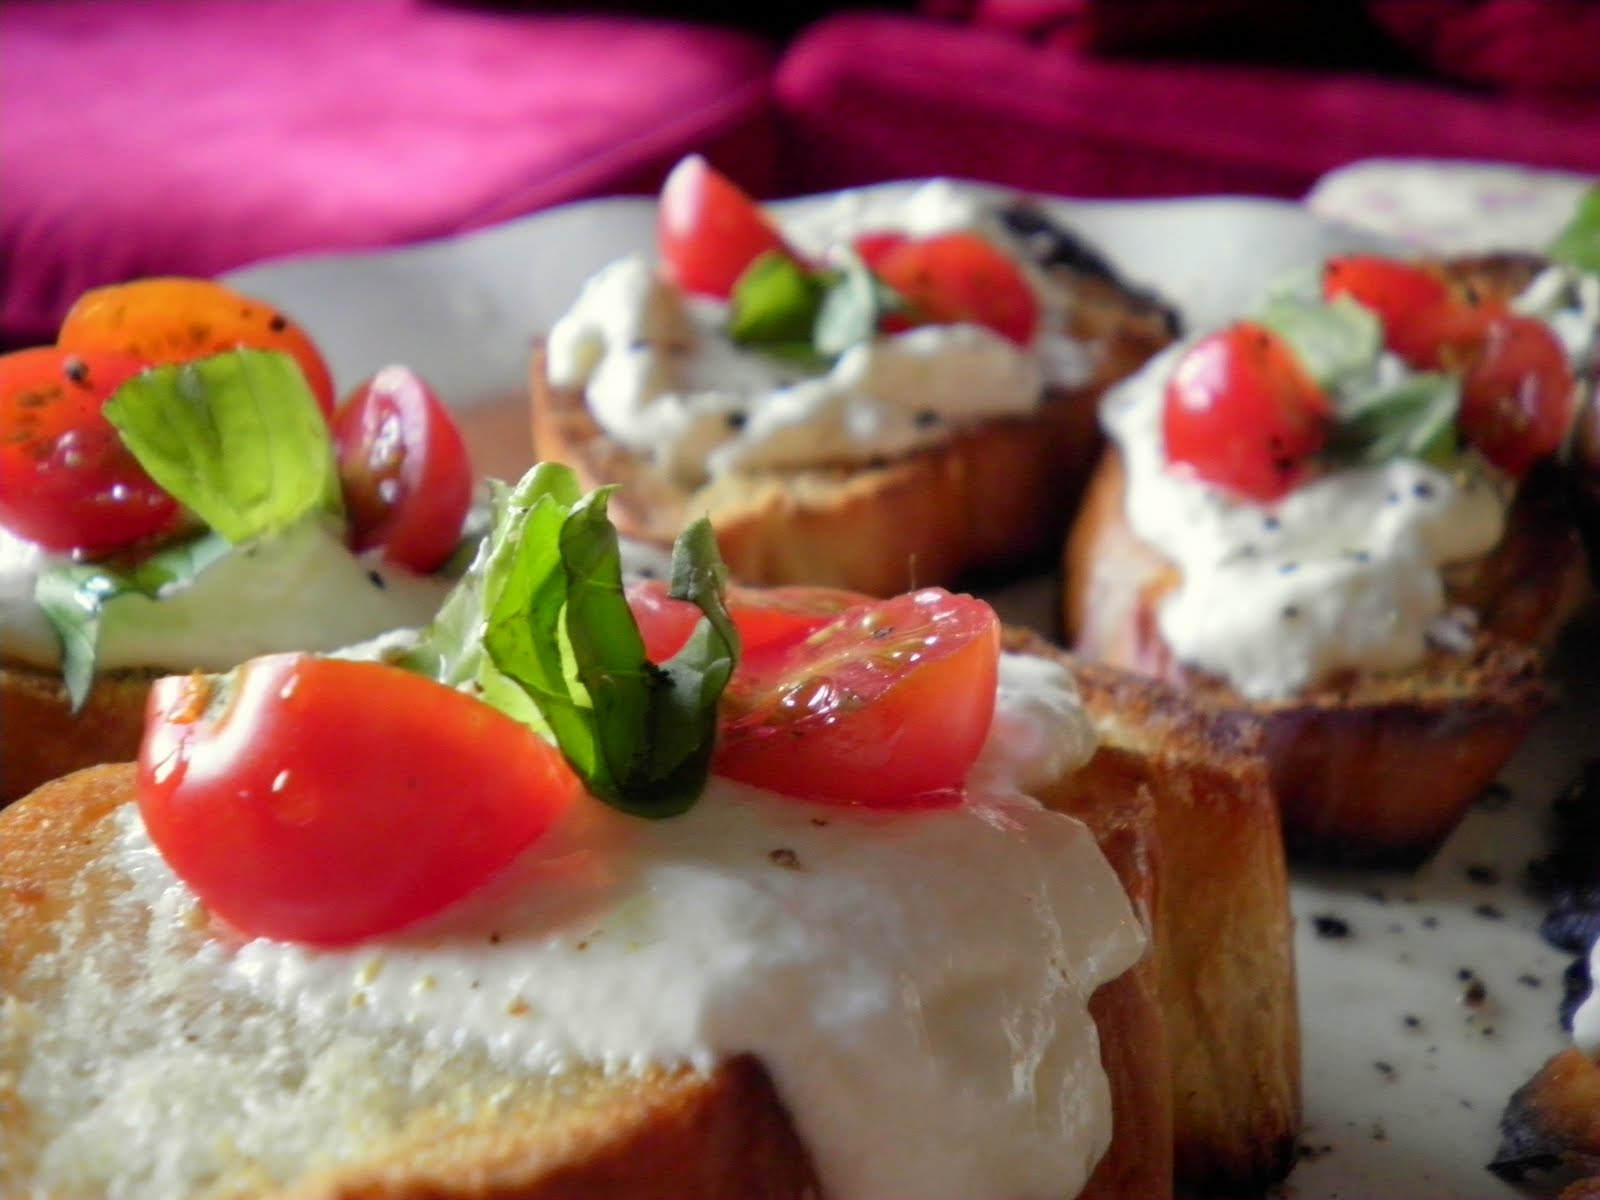

Ricotta Bruschetta (with Homemade Ricotta)


It's going to be really, really hard for me to buy a tub of Ricotta cheese at Publix ever again.

Admittedly, I am a snob about buying stuff in the store that I can otherwise make at home. Cheese, in its difficulty and artistry, is not something I deemed practical or probable for this home cook. But this cheese....oh, this cheese. It's so creamy and light that it doesn't even taste like cheese, but by comparison, it's clear that the plasticky glob that comes from a tub was certainly not the way Ricotta was meant to be enjoyed.

Comprised of 3 ingredients and salt, it's versatile enough that we ate it  in the following ways: off a spoon, piled on untoasted bread with homemade blackberry jam (more on that later), and as pictured, slathered on warm bread, drizzled with garlic olive oil and topped with home grown cherry tomatoes and basil.

For the ricotta, you will need:

3 cups whole milk
1 cup heavy cream
1/2 - 1 teaspoon salt
3 tablespoons freshly squeezed lemon juice (not bottled)

In a medium sized heavy pot, heat milk and cream over medium-high heat until it reaches 190 degrees. Ideally you would hitch a candy or deep dry thermometer onto the side of the pot, but I dropped the probe of a meat thermometer into the pot and it worked just as well. As soon as the milk reaches 190 degrees, take off of the stove and add lemon juice. Stir it gently a couple of times, then leave the pot alone for 5 minutes.

Set a fine mesh strainer lined with a few layers of cheesecloth over a large bowl, and pour the mixture into the strainer. Let the curds drain for two hours, then either eat it immediately or store in the refrigerator in an airtight container until you're ready to serve it.

To make the bruschetta, you will need:

6-8 slices of bread from a loaf of Italian or French bread
2 cloves of garlic, thickly sliced
Small handful fresh basil sprigs, 1 teaspoon reserved and chopped
12-16 cherry tomatoes, sliced in half
Pinch salt and pepper

Heat 3 tablespoons of olive oil in a microwave safe bowl for 30 seconds in the microwave. Immediately add the garlic, chopped basil, salt and pepper and put back in the microwave for 10 seconds. Let steep for 5-10 minutes, then brush each side of the bread with the garlic oil. Place bread slices under a broiler set on low, watching very closely until the bread turns golden brown, then flip and brown the other side. Remove and let cool for 5 minutes. Top each slice of bread with a smear of Ricotta, 3 cherry tomato halves and a sprig of basil. Drizzle with remaining garlic oil if desired.

Ricotta recipe from Smitten Kitchen.

Hummus, Revisited


Back in May, I attempted homemade hummus for the first time. As I mentioned, the bones were there, but the recipe was just terrible. The jalapenos were overpowering, the turmeric was unnecessary, and more hummus was thrown away than was consumed.

Never one to walk away from a concept, I tried it again. Thanks to the Foodie Bride's revelation that her hummus turned out "almost mousse-like," I gave it another shot last night. And it was perfect. Perfectly smooth, perfectly seasoned (with a few tweaks from the original recipe), and I didn't feel like somebody had taken a shot to my mouth after I ate a bite. Please try this, if you enjoy hummus even in the slightest. There's nothing like homemade and you'll never buy it again.

You will need:

4 tablespoons lemon juice
1/4 cup water
7 tbsp Tahini
4 tbsp olive oil, plus more for drizzling
1 15-oz can of chickpeas, drained and rinsed
3 garlic cloves, peeled
1-2 teaspoons kosher salt (or to taste)
1/2 teaspoon cumin
Dash of cayenne
2 tbsp cilantro, chopped or torn

Combine the lemon juice and water in a small bowl. In a separate bowl, whisk the Tahini and olive oil together.

Add the chickpeas, garlic, salt, cumin, and cayenne to the bowl of a food processor and process until almost fully ground, about 30 seconds. Scrape down the bowl. With the food processor running, stream in the lemon and water and process for another couple of minutes. Scrape down the bowl, and again with the food processor running, stream in the Tahini and oil mixture and process until smooth.

After tasting the hummus at this point (having followed the original recipe), I found myself adding more and more tahini, olive oil and lemon juice to get the consistency and taste I wanted. Feel free to play around with it.


Transfer the hummus to a bowl, cover and refrigerate for an hour. Sprinkle with chopped cilantro and a drizzle of olive oil. Store in an airtight container in the refrigerator for up to 5 days.


Adapted slightly from The Foodie Bride.

Jalapeno Hummus and Classic Hummus


Lord. Yeesh. This is some spicy stuff.

You'd think I'd have guessed that, given that Josh found the recipe on jalapenomadness.com, but it seemed like a good recipe for our first attempt at homemade hummus. After all, we both like spicy food.

No. This stuff was off the charts, dangerously close to "not even tasty" territory... after a few dips, I was just not enjoying it anymore.

Maybe I'm being a bit harsh, because the bones were there - it was creamy and certainly had that distinct hummus taste, so it was more or less a success. If you're into that crazy-spicy hummus sort of thing, then try out the original recipe. If not, I'm listing my omissions and adaptations right off the bat to turn the jalapeno hummus into the more classic hummus, with only a hint of garlic flavor and a lot less like a punch to the mouth.

In order of importance:
  • Zero jalapenos. Adding a third of a cup of pickled/jarred jalapenos, as the recipe calls for, is insanity.
  • No curry powder. I believe it was the turmeric in the curry I used that transformed my hummus into mustardy, nuclear hummus. Ick.
  • Not 3, but 2 cloves of garlic. Next time, I'll roast them first.
  • No crushed red pepper.
  • Add about 1/2 a tablespoon of olive oil to the food processor at the end.
  • Maybe a teeny tiny touch of salt at the end as well.

Anyway, here's the original.

You will need:

1 cup garbanzo beans (chick peas), drained and rinsed
1/3 cup canned jalapeno pepper slices
3 tablespoons tahini
3 cloves garlic, minced
2 tablespoons lemon juice
1/2 teaspoon ground cumin
1/2 teaspoon curry powder
Crushed red pepper to taste

In a blender or food processor, mix the garbanzo beans, jalapeno peppers, tahini, garlic, and lemon juice. Season with cumin, curry powder, and crushed red pepper. Blend until smooth.

Potstickers

These are so much fun to make, monotony and initial complexity aside. We wonder now why we ever paid up to $9 for a 20-count box of the little suckers, when one evening at home stuffing and wrapping yields a good hundred potstickers, for about $7!


We tried making these with the kid, and while I think older kids would be pretty good at it, younger ones seem to have a hard time getting the right amount of filling inside, and a good seal on the wonton wrappers. And they must be sealed well! It did take a while at first to get the flavors and wrapping and cooking methods right, but I'm here to unlock the mystery for you. The great thing is, it's totally customizable based on your spice tolerance and meat preferences. The first time we used ground turkey, but this time we gave it a shot with ground pork.


It's very important to get uniform pieces of all the vegetables so nothing pokes through the wonton dough. This is why I recommend using a food processor. Grating with a hand grater is fine, aside from the fact that it'll take you forever to get through all the vegetables.

You will need:

1 pack wonton wrappers (usually found refrigerated in the produce section)
1 lb ground meat (turkey, pork, chicken, or a combination)
4 carrots, peeled, shredded in a food processor or grated
1 small to medium head of cabbage, shredded in a food processor or grated
1 medium onion, shredded in a food processor or grated
3 cloves garlic, grated (in my experience, garlic in a food processor is a bad idea)
Generous amount of salt
Generous amount of black pepper
3-4 tablespoons soy sauce (I use light soy to control the sodium)
1 tablespoon Sriracha or concentrated chili paste
2 tablespoons packed brown sugar
1 tablespoon garlic powder

Combine all ingredients in a large mixing bowl. At this point you can either cover the mixture well and refrigerate for 24 hours, or you can get to wrapping. If you do get to wrapping, I recommend cooking a "test patty" in a small skillet with hot vegetable oil to test your seasonings. Letting it sit in the refrigerator will enhance the flavors, and making a tester isn't quite as necessary. Stuffing the wontons will also be much easier when the filling is well-chilled.

Get to filling:

You'll need a small bowl of water, and 2 sheets of wax paper: one to fill and one to set finished potstickers aside.


Spoon out about a tablespoon of filling onto a wonton square.


Form it into a ball, and then press into an oblong shape, diagonally. Slightly dampen the outside edges of the square with water, being sure not to oversaturate the dough.


Fold one end of the square diagonally over the filling.


Press the dough down where the edges meet to seal well.


Place the filled side of the wonton down onto wax paper or a cookie sheet; apply a slight bit of pressure to flatten the bottom of the potsticker.


Repeat for eternity.


You can freeze as many as you want in plastic baggies at this point, BEFORE you cook them. When you're ready for them, just cook them from frozen as you would from thawed.

To cook:

The cooking method for potstickers seems to defy all laws of cooking, but it actually works. Oil and water mix in a skillet in an effort to simultaneously fry the bottoms and steam the tops of the potstickers.

Coat the bottom of a skillet with oil. We used extra virgin olive oil here, but vegetable or canola would be fine also.


Allow to heat, then add potstickers flat side down.


SLOWLY add a tiny bit of water (just a few tablespoons) around the potstickers.


And quickly cover with a lid. Allow the potstickers to both steam and fry; you will know they're ready to come out when the edges turn golden brown.


Drain quickly on paper towels. Too long and the potstickers will stick to the paper towels, and potstickers should really only...stick to a pot. I guess?


Gorgeous!

If you want, you can make your own dipping sauce. If not, bottled stuff is fine.

Dipping Sauce

I do not have measurements for the sauce - I threw it together without thinking. The best I can do until it's time to make more sauce is list the ingredients from biggest portion to smallest portion.

You will need:

Soy sauce
Grated ginger
Chopped garlic
Orange juice
Sliced green onions (white and green parts)
Sriracha or concentrated chili paste
Brown sugar
Black pepper
Salt

Add all ingredients to a small saucepan and simmer over low-medium heat for 5-10 minutes. Transfer to a cruet or glass jar. Serve hot.


And there you have it! Totally customized, made with love, inexpensive Chinese takeout, with plenty more in the freezer for another potsticker craving.

By the way, you can also use wonton wrappers to make homemade ravioli. But that's another post for another day.