Vanilla Preserved Strawberries

I hesitated to post this, given that I've done something similar in the past with strawberry jam. I won't lie and say that these preserved strawberries are leaps and bounds different, but they're different enough that I think they're worth a try. Plus, they're less labor-intensive than jam.

The canning bug bit me last summer and I was practically writhing in anticipation of summer's fresh produce so I could get a move on already. There's nothing prettier than a stack of homemade jams and pickles in crystal-clear jars, and the ability to give away to friends what was just ripening in your backyard the day before brings a feeling of community, of old-timey nurturing.

Or, some might say, perhaps I just glorify food too much.

Obviously these preserved strawberries can be used in many ways that strawberry preserves can; they just come out of the jar in whole, plump pieces that break and smoosh under the slightest pressure from a knife.
And, as I learned today, they add a little something to a ham and blue cheese wrap - something summery and just sweet enough that other condiments simply cannot achieve.

Note - I used powdered pectin on a whim, but looking back I would have left it out. If you want to use it for a jammier texture, add about a tablespoon.

You will need:

2 pounds strawberries, hulled but left intact
3/4 cup sugar
2 tbs lemon juice
2 vanilla beans, split and cut in half

If you are canning the strawberries, prepare your canning materials. This recipe yielded two pints.
Place the strawberries and sugar in a heavy, large pot and turn heat to medium. As the strawberries simmer they will release their own juices - once this happens, pour in the lemon juice and add the vanilla bean.
Allow the strawberries to come to a boil, and the second they do, remove them from the heat. If you're not preserving for later, let them cool slightly, then store in a glass container and refrigerate.

If you are preserving, ladle the strawberries and juice into canning jars, being sure to include one half of a vanilla bean in each jar. Leave 1 inch headspace and process for 15 minutes in a water bath canner.

Ricotta Bruschetta (with Homemade Ricotta)


It's going to be really, really hard for me to buy a tub of Ricotta cheese at Publix ever again.

Admittedly, I am a snob about buying stuff in the store that I can otherwise make at home. Cheese, in its difficulty and artistry, is not something I deemed practical or probable for this home cook. But this cheese....oh, this cheese. It's so creamy and light that it doesn't even taste like cheese, but by comparison, it's clear that the plasticky glob that comes from a tub was certainly not the way Ricotta was meant to be enjoyed.

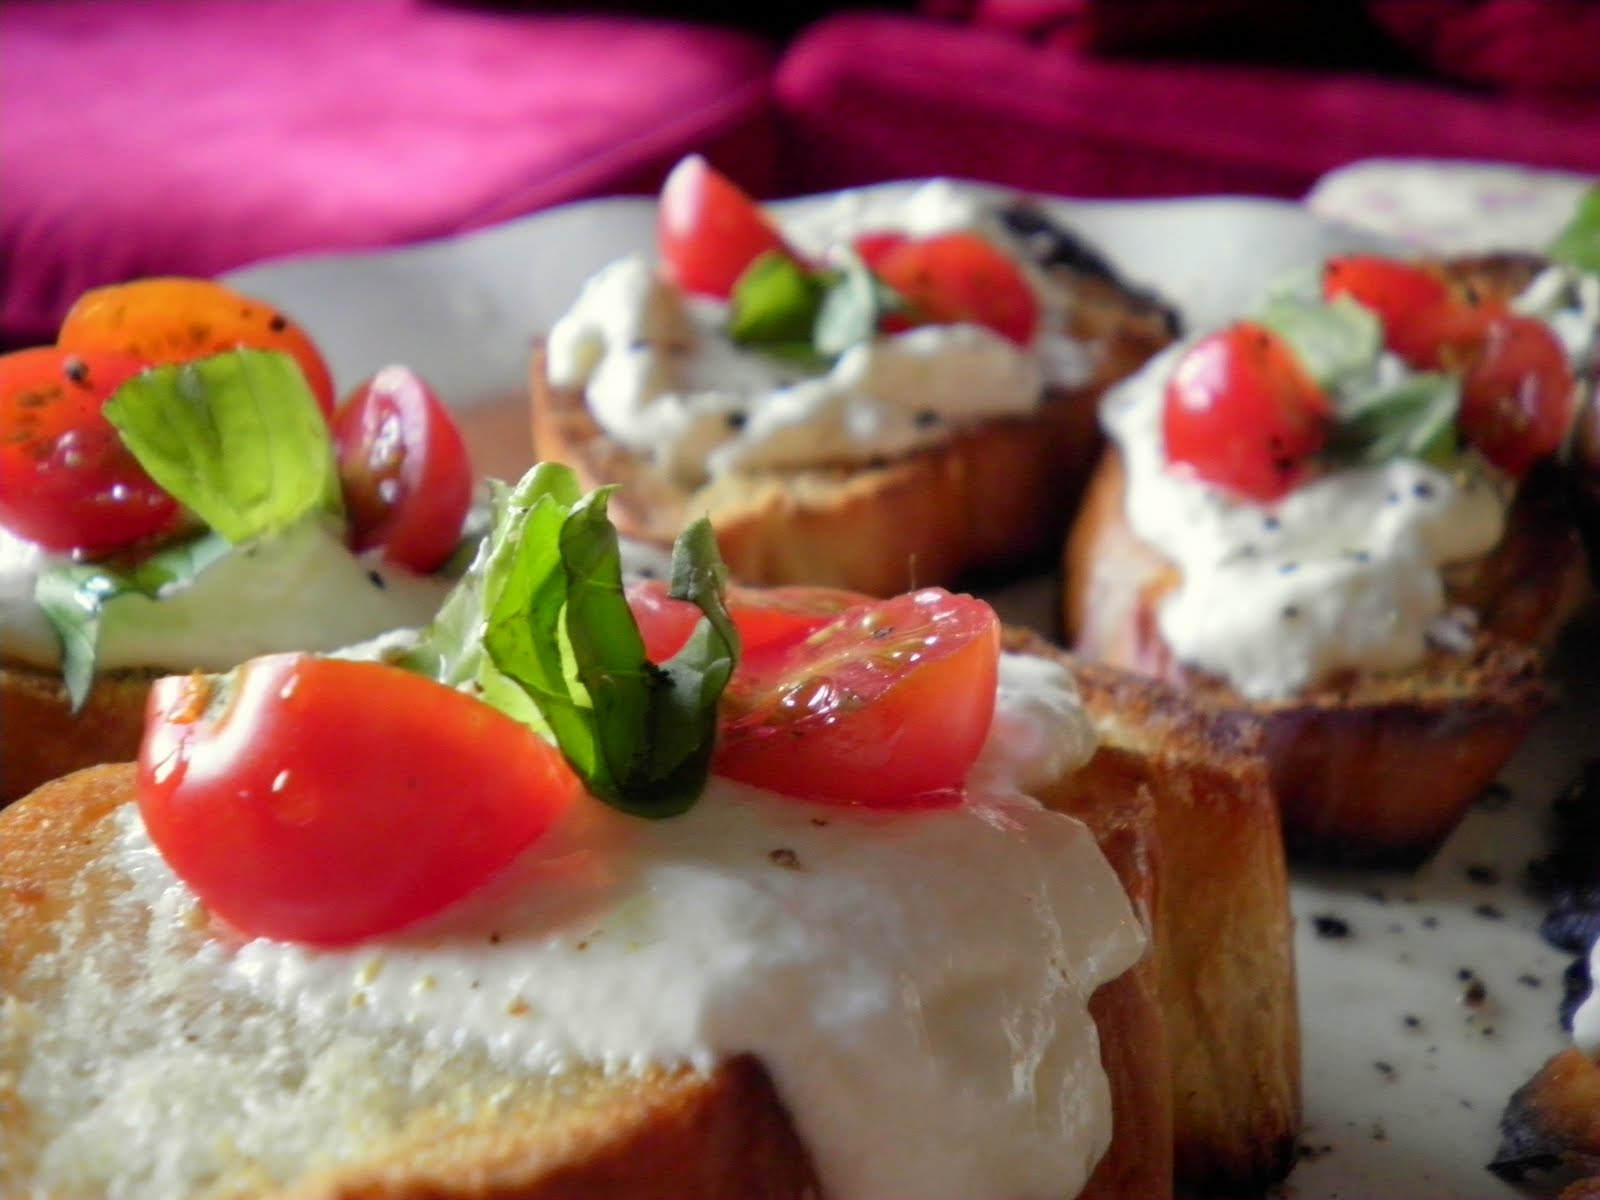
Comprised of 3 ingredients and salt, it's versatile enough that we ate it  in the following ways: off a spoon, piled on untoasted bread with homemade blackberry jam (more on that later), and as pictured, slathered on warm bread, drizzled with garlic olive oil and topped with home grown cherry tomatoes and basil.

For the ricotta, you will need:

3 cups whole milk
1 cup heavy cream
1/2 - 1 teaspoon salt
3 tablespoons freshly squeezed lemon juice (not bottled)

In a medium sized heavy pot, heat milk and cream over medium-high heat until it reaches 190 degrees. Ideally you would hitch a candy or deep dry thermometer onto the side of the pot, but I dropped the probe of a meat thermometer into the pot and it worked just as well. As soon as the milk reaches 190 degrees, take off of the stove and add lemon juice. Stir it gently a couple of times, then leave the pot alone for 5 minutes.

Set a fine mesh strainer lined with a few layers of cheesecloth over a large bowl, and pour the mixture into the strainer. Let the curds drain for two hours, then either eat it immediately or store in the refrigerator in an airtight container until you're ready to serve it.

To make the bruschetta, you will need:

6-8 slices of bread from a loaf of Italian or French bread
2 cloves of garlic, thickly sliced
Small handful fresh basil sprigs, 1 teaspoon reserved and chopped
12-16 cherry tomatoes, sliced in half
Pinch salt and pepper

Heat 3 tablespoons of olive oil in a microwave safe bowl for 30 seconds in the microwave. Immediately add the garlic, chopped basil, salt and pepper and put back in the microwave for 10 seconds. Let steep for 5-10 minutes, then brush each side of the bread with the garlic oil. Place bread slices under a broiler set on low, watching very closely until the bread turns golden brown, then flip and brown the other side. Remove and let cool for 5 minutes. Top each slice of bread with a smear of Ricotta, 3 cherry tomato halves and a sprig of basil. Drizzle with remaining garlic oil if desired.

Ricotta recipe from Smitten Kitchen.

Black and Blue Berry Cobbler


When I was 16 with my first taste of freedom in the form of a driver's license and a car, and heavily influenced by the Food Network (which was just gaining ground), one summer night I told my mom I was taking over dinner. I remember it vividly: we were having my and my brother's mutual friend Jeff over for dinner, and I would make chicken cordon bleu, salad and raspberry pie. After an awkward exchange with an ex-boyfriend at the deli counter, I ventured to the frozen aisles for my raspberries - the thought of buying fresh raspberries, in July, in Texas, never entered my mind. Figures. I'm also 99% sure I used a frozen pie crust.

My chicken, while tasty, was laden with toothpicks and dinner became an adventure as everyone compared the amount of toothpicks by which their chicken was fastened together.

The pie, however, was probably doomed to begin with. Had I known the joy of seasonal produce, and had I been working with a recipe (I didn't need one because I was a genius, after all) my pie wouldn't have required the exorbitant amount of sugar I doused it with. Of course I was convinced that it would be glorious and perfect, but I watched in disappointment first as the raspberry juices puddled all over my plate, and again as confused puckering, mirroring my own, spread across everyone's mouths. "I can't decide if it's too sweet or too tart," I wondered aloud.

"It's both," my dad and Jeff answered in unison.

I think I waited until college before I attempted another pie.

Fortunately, cobblers are much more forgiving. A biscuit topping instead of two crusts prevents any sogginess of the bottom crust, and what better way is there to showcase plump summer berries?
 
For the biscuit topping, you will need:

1 1/2 cups flour
1/2 cup sugar
1 1/2 teaspoons baking powder
1/2 teaspoon salt
1 teaspoon cinnamon
9 tablespoons very cold butter, cut into pieces
1/3 cup boiling water

For the filling, you will need:

2 tablespoons corn starch
1/4 cup cold water
1 tablespoon lemon juice
2-3 cups fresh blueberries
2-3 cups fresh blackberries
1/2 cup sugar

Preheat oven to 400 degrees.

To make the topping, whisk together the dry ingredients. With your fingers or a pastry knife, cut in the butter and work through the dough until the flour resembles coarse crubms. Add the boiling water and stir until a sticky dough forms.

Combine all of the filling ingredients, making sure to coat all the berries well (the mixture will appear to be a bit watery). Pour the filling into a 10" deep dish pie plate or cast iron skillet and drop spoonfuls of the dough to cover the top (do not spread the dough over the berries).

Bake for 25-30 minutes or until topping is crisp and golden brown, and berries are thick and bubbly. Cool for 10 minutes before serving.

Adapted from Cooking for Seven.

Wine-Soaked Grilled Portobella Mushrooms


I have been off on a whirlwind culinary adventure in New York City, the first of at least a hundred trips to New York in which I was in total control of where I went, what I ate and how late I came home. "Home" in this case was my uncle's house, which used to be my grandparents house, which is also the house my dad grew up in. It's been in the family for 40-odd years and while I'm always grateful to consider it my "New York House," the limitations I'm generally under are...stifling.

When I was in college and living in Rhode Island, I'd spend my Thanksgiving breaks with my grandparents. Though I was itching to get out into the city (it was the heyday of Sex and the City, after all), my worrisome Italian-Catholic grandmother would wring her hands and cross herself just in anticipation of all the horrible things that could happen to me on the subway trains. As I got older and my leash was loosened inch by inch, I would venture to the city only after being dropped off at the 7 station, and with my cell phone at my ear every 20 minutes. Of course I had no idea what I was doing or where I was going, so I'd often wind up in a semi-untouristy restaurant in Times Square, irritated knowing there was so much more to see. Ultimately I'd decide it wasn't worth it, and would head back to Queens, but not before a phone call to warn my grandfather that I'd need to be picked up at the station in approximately 35 minutes.

I miss my grandparents. They're still all over that house and the scent of my grandfather overwhelms me with nostalgia every time I step through the front door. But I have to say that I don't miss being any younger than I am now, without license to go where I please and be considered an adult. And look, I made it back to Tennessee in one piece. My grandmother, somewhere, is sighing with relief and probably thanking Jesus personally for my safe return.

Underneath this recipe for grilled portobella mushrooms, which are tied to this post inexplicably save for the fact that it was the first meal I prepared after being waited on for 4 days straight at various NYC eateries, is the full list of everywhere and with everything I stuffed my face while there. Do check them all out next time you're in the big city...if you're allowed to leave the house, that is.

You will need:

2 large portobella mushroom caps
1 cup white wine
1/2 cup dry vermouth or sherry
1/4 cup olive oil
Splash white vinegar
3 garlic cloves, smashed and roughly chopped
Small handful fresh parsley, chopped
Small handful fresh basil, chopped
Small handful fresh chives, chopped
Salt and pepper

Wipe the mushroom caps clean with a damp paper towel. Remove the stem and discard. To remove the gills, scrape them out with a spoon.

Combine all ingredients in a medium bowl and whisk to combine. Let mushroom caps sit in the wine bath for up to an hour. Add salt and pepper before grilling over a low flame, cooking until softened.


NYC Eats:

Cafeteria
119 7th Avenue, Manhattan
Classic macaroni and cheese, cheeseburger, fries, Mojito, side of pretention.

Lucy's Whey
Chelsea Market, Manhattan
Grilled cheese sandwich, sea salt and beer-pretzel caramels.

Eleni's Cookies
Chelsea Market, Manhattan
Chocolate cupcake with pink buttercream.

Magnolia Bakery
401 Bleecker Street, Manhattan
Magic bar.

Pop Bar
5 Carmine Street,  Manhattan
We came here once a day - I had a mixed berry sorbetto popsicle, a vanilla gelato popsicle dipped in hazelnuts and dark chocolate, and a coffee gelato popsicle dipped in hazelnuts and milk chocolate.

Dean and Deluca
1150 Madison Avenue, Manhattan
Everything bagel with cream cheese, strawberry-rhubarb juice.

Corona Pizza
5123 108th Street, Corona, Queens
Slice of Rustica pizza and garlic knots.

Balthazar
80 Spring Street, Manhattan
The most perfect Mojito I've ever had, steak tartare, moules frites, strawberry-rhubarb crisp (best meal of the trip).

Southern Hospitality 
1460 2nd Ave, Manhattan
Fried pickle chips, champagne-St. Germain cocktail (classy, no?).

Brooklyn Brewery
79 N 11th Street, Williamsburg
Wheat beer.

Blue Bottle Coffee Co.
160 Berry Street, Williamsburg
New Orleans coffee, s'more.

Taim
220 Waverly Place, Manhattan
Harissa falafel sandwich, fries with saffron aioli, brown sugar lemonade.

MoMA Cafe 2
11 W 53rd Street, Manhattan
Hearts of romaine salad, foccacia, too much of Angela's fontina polenta (sorry girl).

Zucchini Bread


If you're like me, you have zucchini plants multiplying at a rate you couldn't possibly consume without hating zucchini by next summer, and you're resenting your decision to "just plant two" because one couldn't possibly be enough, right? You try to give them away, but for some reason everyone but you is privvy to the squash-spitting plant's overpopulating tendencies and all your co-workers offer a polite "no, I've got my own, thanks."

Grrr.

Apparently there are 1,357,039 other bloggers (rough estimate) who are also thisclose to the edge of similar zucchini-induced madness. If I were more creative this weekend and less pressed for time, I would have stepped outside the loaf pan and come up with something more enticing than zucchini bread, but hey - it took the biggest, honkingest zucchini out of my present squash collection and I got to use my fancy new julienne peeler in the process. Of course between the three of us we couldn't finish the whole loaf, so now those same co-workers who refused my raw zucchini offerings are munching on the spoils anyway.

I found this recipe to come out a little on the dry side. Next time, I'll reduce the flour slightly and will also grate the zucchini as specified instead of julienning it - I'm curious as to whether the julienned strips released less water than the grated would have.

You will need:

2 eggs, beaten
1 cup sugar
1/3 cup brown sugar (packed)
2 teaspoons vanilla
3 cups grated fresh zucchini
2/3 cup melted unsalted butter
2 teaspoons baking soda
Pinch salt
3 cups all-purpose flour
1/2 teaspoon nutmeg
2 teaspoons cinnamon
1 cup chopped pecans or walnuts (optional)
1 cup dried cranberries or raisins (optional - I did not include)

Preheat the oven to 350 degrees. In a large bowl, mix together the sugar, eggs, and vanilla. Mix in the grated zucchini and melted butter. Add baking soda and salt, then the flour, a cup at a time, incorporating completely after each addition. Add the cinnamon and nutmeg and mix. Fold in the nuts and dried cranberries or raisins, if using.

Divide the batter equally between 2 buttered 5 by 9 inch loaf pans, or pour into one by loaf pan. Bake for 1 hour (check for doneness at 50 minutes) or until a wooden pick inserted in to the center comes out clean. Cool in pans for 10 minutes. Turn out onto wire racks to cool thoroughly.
 
Adapted from Simply Recipes.

Homemade Hamburger Buns


As much as I like to make bread and as often as I would rather make something at home than buy it at the store, I generally have no issue with storebought bakery bread. Yesterday, though, Josh propositioned that I change it up a little, and find a recipe for burger buns and make them at home. Why not?

I turned to Annie's Eats, which I can usually count on for a pretty dead-on version of any homemade store-bought item, and once again, I wasn't let down. Unfortunately, I screwed them up the first go-round.

Generally I like to measure flour in weight, not volume. So not really thinking about it, I measured out 24 ounces of flour (3 cups). It was only after my dough turned rock-hard that I realized I'd done something wrong - volume and weight are not always exactly interchangeable. Oh well. Next time I'll do the research first. I wound up having to go to the store anyway for more bread flour and briefly considered the stupidity of the situation...I was at the store, so why didn't I just pick up a pack of burger buns?

I forged ahead though, and after deflecting the snarky "you sure come here alot" comment from the grocery cashier, I quit trying to be cool and actually followed the recipe on my second attempt. The dough came together and rose flawlessly. The buns themselves were airy and crisp, and substantial enough to hold up my drippy early summer cheeseburger.


You will need:

3 tbsp. warm milk
1 cup warm water
2 tsp. instant yeast
2½ tbsp. sugar
1½ tsp. salt
1 large egg
3 cups bread flour
1/3 cup all-purpose flour
2½ tbsp. unsalted butter, softened

Egg wash (1 egg plus 1 tablespoon water), for adhering sesame seeds

In the bowl of a stand mixer fitted with the paddle attachment, combine the milk, water, yeast, sugar, salt and egg. Mix on medium speed to combine. Add the flours to the bowl, and mix on medium speed until incorporated. Add the butter - make sure it's completely softened to avoid chunks of butter throughout the dough.

Switch to the dough hook and knead on low speed for about 6-8 minutes. This is a sticky dough, so don't add extra flour. Instead, flour your hands and transfer the dough to a lightly oiled bowl. Turn the dough to coat all the dough in oil. Cover with plastic wrap and let rise in a warm place until doubled in bulk, 1-2 hours.

Line a baking sheet with parchment paper or a silicone baking mat.  Turn the dough out onto a pastry mat, then divide the dough into 8 equal parts with a chef's knife.  Gently roll each portion of dough into a ball and place on the baking sheet, 2-3 inches apart.  Cover loosely with lightly oiled plastic wrap and let rise again, 1-2 hours, until nearly doubled.

Set a large metal pan of water on the lowest rack of the oven.  Preheat the oven to 400 degrees with a rack in the center. Brush the tops of the buns lightly with the egg wash and sprinkle with sesame seeds.  Bake the buns about 15 minutes rotating halfway through baking, until the tops are golden brown. Do not overbake! Transfer to a rack to cool completely. Split and serve with your favorite burger.

Recipe from Annie's Eats.

Baked Ziti with Mini Meatballs


My neuroses surrounding events and parties and all they entail may officially be getting out of control.


This is why. All this, plus 40 different lists of things to buy/do/bake/cook, is party central. Am I hosting a dinner party? My parents' anniversary? Not quite...it's Alyssa's 9th birthday in a couple of weeks, and judging by everyone's surprise that there will be 1) a theme, 2) homemade paper goods and cake, and 3) a massive spread of party foods, I may have gone a little mental.

But you know what I say? I love the kid. I love her like she was my own. You love your kids too, I know this. But perhaps you didn't get your degree in Event Management, then after being unable to find a job in said field, rely on the occasional kid's party, work luncheon and Christmas dinner to fill up that cavernous space inside you that can only come from not doing for a living what you truly, truly want to do.

I'll tell you...that space hurts a little. So Alyssa's party is not only for her, and for the family and friends that will be joining us, but yes, it's for me too. Just tell me to shut up when I complain that I've run out of room in the fridge to house my spread the night before the party.

What that has to do with baked ziti, I don't know. It was a quick weekend meal when the party planning had gotten into full swing and I was looking forward to starting my paper crafts for the party (I made her banner myself).


You will need:

1 pound dried pasta shapes, your choice
28 ounces prepared Marinara sauce, homemade (recipe follows) or store-bought
1 pound shredded Mozzarella cheese
1 14-ounce container of Ricotta cheese
1/2 cup shredded Parmesan cheese
2 cloves minced garlic
Small handful fresh basil, chopped
Small handful fresh Italian parsley, chopped
2 pounds mini meatballs (recipe follows)

Boil pasta according to package directions. Drain, and pour into a casserole dish. Immediately pour Marinara sauce and stir to coat each noodle.

Combine Ricotta cheese, Parmesan cheese, minced garlic, basil and parsley in a bowl with salt and pepper. Dot over the top of the pasta and meatballs, and swirl into the sauce with a spoon.

Nestle prepared meatballs throughout the casserole. Sometimes I do neat rows, other times I just toss them in. You just want to make sure that every spoonful will have a few meatballs when the dish is served.

Top with shredded Mozzarella cheese and bake at 400 degrees for 15-20 minutes, or until the cheese is brown and bubbly. Serves 8-10...or 3, with plenty of freezable leftovers.

Homemade Marinara Sauce

Olive oil
2-3 cloves minced garlic
1 medium onion, diced
1 large can (28 ounces) crushed tomatoes
1 can (14 ounces) diced tomatoes
Water
Chopped fresh basil
Chopped fresh Italian parsley
Dried oregano
Salt, pepper and sugar to taste

In a large, heavy-bottomed pot, heat olive oil over medium heat. Once oil starts to shimmer, add chopped onion and stir. Cook until the onions are translucent, then add garlic and cook until fragrant, about 2 minutes.

Pour in the crushed and diced tomatoes. Fill up the 14-ounce tomato can with water and add to the pot. Stir to combine, cover, and allow sauce to heat to bubbling. Once it has started to bubble, reduce heat and add basil, parsley and oregano. Season to taste with salt, pepper and sugar.

Occasionally I'll add about 4 ounces of red wine at this point, but it's completely optional. Cover the sauce and cook over medium heat for a minimum of 30 minutes - but cook it over very low heat all day if you can!

Mini Meatballs

Olive or vegetable oil for browning
2 lbs ground meat (I like a combination of 80/20 beef and ground turkey)
1 egg
1/2 cup breadcrumbs
1/4 cup grated Parmesan or Romano cheese
2 cloves garlic, smashed
Small handful fresh parsley, chopped
Small handful fresh basil, chopped
Salt and pepper to taste

Note: start with the given measurements – you can always add more later. Once your mixture is combined and your oil is hot, make a tester meatball and adjust the seasonings to your taste (I usually add more cheese and salt).

In a large bowl, combine ground meats, egg, cheese, herbs and salt and pepper.

Heat the oil in a large skillet over medium-low heat. Add the smashed garlic cloves and heat gently, both to brown the garlic and infuse the oil slightly. Once the garlic cloves are browned, remove from oil and chop to add to ground beef. Combine well – it helps to use your hands instead of a spoon. Get them dirty!

Start rolling your meatballs. Of course you can make them whatever size you like, but for this recipe I like them to be about the size of a large gumball – which would equal about a tablespoon of the meat mixture. Roll them into balls and place them on a plate until you’re ready to fry. When you’re ready to go, raise the heat to medium-high and add them to the pan. If you think of your skillet as a clock, I like to start at the 6:00 position and work my way around clockwise so I always know which meatball I started with, and thus needs to be turned first. Keep them about an inch apart so they brown evenly. Do not disturbe them and in about 2 minutes, they will be browned and ready to flip with tongs (they may not be cooked all the way through, which is fine - they'll finish cooking in the oven). Work your way around the pan the same way you put them in - first in, first out.

Drain on paper towels, add to ziti and sauce, top with cheese and bake.